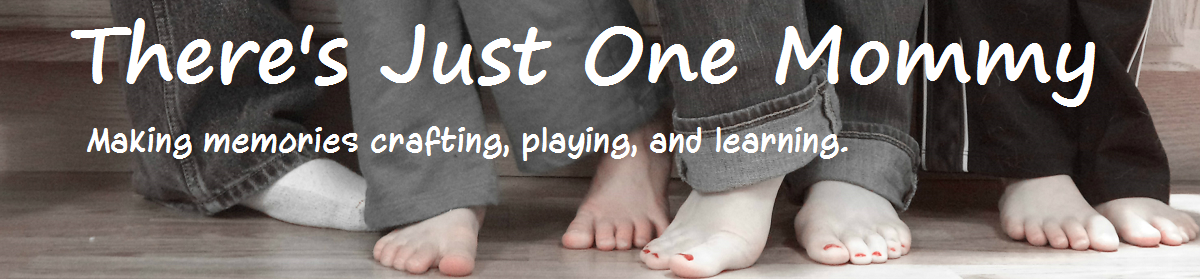
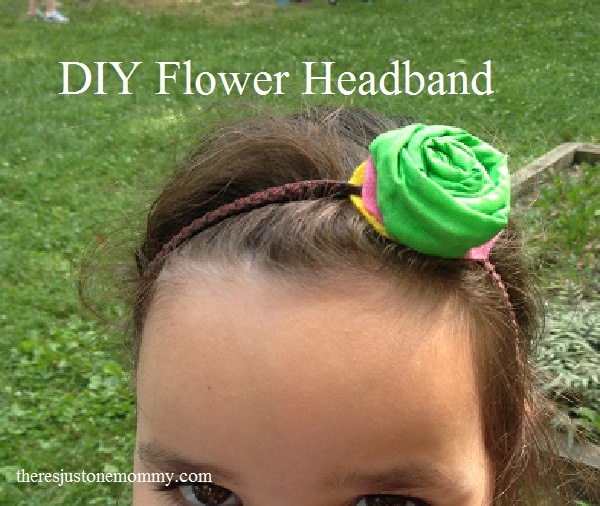
Do you have a little girl in your life? Does she love hair accessories?
Then I bet she’d love to make her own Flower Headband!
Materials for DIY Flower Headband
For each headband you will need:
- 1 plain elastic headband
- 2 pipe cleaners
- strip of fabric measuring 2″ x 20″
- hot glue
- 2 felt circles approximately 1 1/2″ in diameter
Directions for Flower Headband
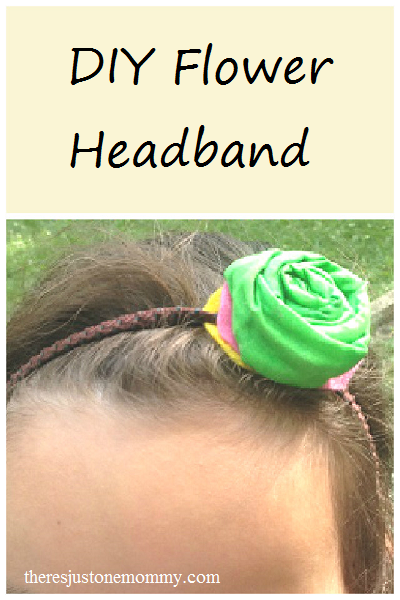
- Take the 2 pipe cleaners and overlap their ends about 2″. Twist them together to make one large pipe cleaner.
- Lay the twisted together pipe cleaners in the center of your fabric strip.
- Fold over the top edge of the fabric and glue it to the bottom edge.
- Starting at one end of the pipe cleaner and fabric, start rolling. (Kind of like a cinnamon bun!)
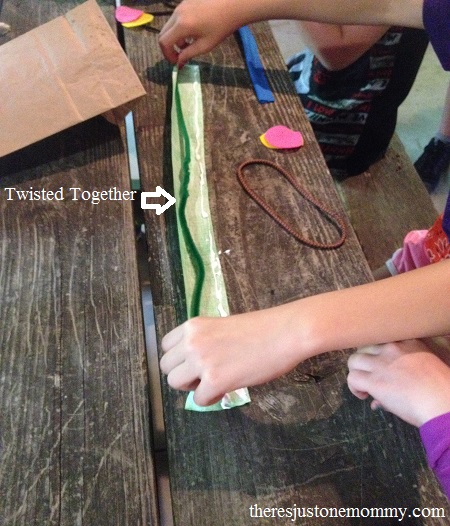
- Once it is rolled, hot glue the bottom of your “flower” to one circle of felt. (You may want to use felt that matches your fabric, we chose not to.) Kind of squish your flower down onto the felt.
- Hot glue this felt to the plain headband. Then you will hot glue your second felt circle on top to cover it.
- Once it is dry you can trim the felt if desired.
Now you have your very own, one of a kind, flower headband to wear!
Looking for a frugal way to organize all those hair supplies?
Check out our DIY hair accessories organizer!


Ai says
Looks cute! My daughter would love this!
Steph says
Wow! That is so much easier that I would have expected. If you get a chance I’d love if you could link this up on My Favorite Things.
Jennifer Johnson says
Clever! I have never seen anyone use a pipe cleaner to roll the flower. I am going to try this method!
OneMommy says
Definitely made it easier for the kids!