Snuggled up on bean bags inside its orange and yellow walls, I fell in love with books. My kindergarten teacher had a cardboard castle set up as a reading area, and at the end of the school year, I was the lucky child that got to take that castle home. It was dragged outside on summer days and provided years of pretend play whenever friends came to visit.
Because those memories are so precious to me, I could not wait to give my children the magic of their own cardboard castle playhouse. This is by far our favorite recycled craft ever, and has had several years of use so far.
When we started our medieval castle unit this school year, I just knew we had to make our very own castle. Thankfully I’m a bit of a hoarder when it comes to cardboard boxes, and we still had the huge furniture box my husband’s armoire came in years ago. Even before kids I KNEW that box had playhouse potential!
*Furniture and appliance boxes work great for making playhouses. If you don’t have a large box handy try calling an appliance or hardware store to see if they have empty boxes from the appliance they have on display.*
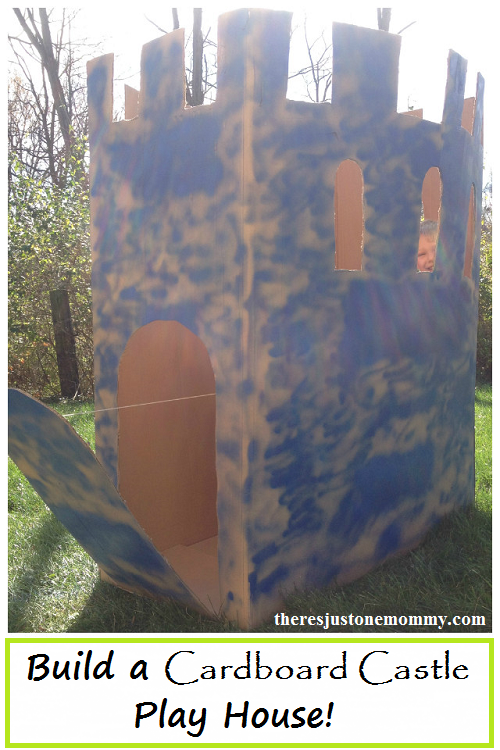
DIY Cardboard Castle Playhouse
During our medieval castle unit we read about different castle structures that were built for defensive purposes. When we built our castle playhouse we tried to incorporate as many of those features as we could.
The first item the kids decided to add to their cardboard castle was a drawbridge. We used a marker to outline the area to cut. Then I used my bread knife to carefully cut out the drawbridge. (Using a bread knife in a sawing motion is much easier than trying to cut a large amount of cardboard with scissors.)
We used a nail to poke a small hole towards the top of the drawbridge door on one side. A long piece of yarn was threaded through the hole with a large bead tied to each end. This makes a convenient way for the kids to pull up the draw bridge once they are inside.

Next they asked for loophole windows in the castle. The narrow loopholes made it hard for attackers to shoot into the castle, while allowing the archers inside to easily shoot out. The kids helped measure and draw three windows on each of the castle’s sides. Then I carefully cut out each piece.
One of the most distinctive features seen on many medieval castles is at the top. The battlements of the castle allowed guards to take cover during an attack, while easily moving to the open spots to shoot. We used a ruler to measure the space between the battlements of our castle and tried to make them as even as possible.
Once all the cutting was complete, we used a can of spray paint to give the castle a mottled appearance to make it look a bit more like stone.
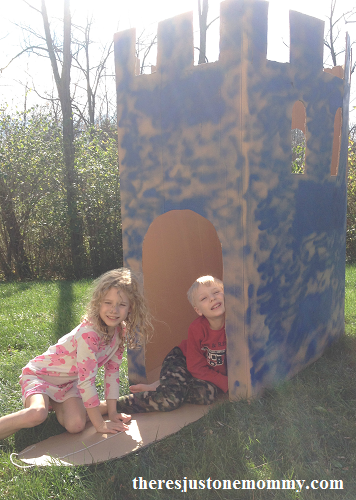
This cardboard castle is great for pretend play. Add some blankets, pillows, and books and the castle makes a cozy reading spot, too.
For more castle activities:
- Practice spelling words with kinetic sand castles.
- Design your own coat of arms to hang in the cardboard castle.
Do your kids love to build? Get more building fun with our Up! ebook. 


swapna says
This is AMAZING! We built one too (with a draw bridge & all!) But not as big as this!! Would love to see your posts in the Practical Mondays Link Up:)
OneMommy says
I admit, this is the largest box I have ever seen. I guess that’s why I kept it all these years.
Erin @ Nourishing My Scholar says
This is FANTASTIC!!!! We have a washing machine box that we were going to make into the Dr. Who TARDIS…but….a castle could be epic too! #FridayFlashBlogLinkParty
OneMommy says
Washing machine boxes are so much fun to craft with no matter what you make — the kids will love it!
Tiffany says
This looks like such amazing fun!! For me and the Kiddies…LOL Thanks for sharing such an easy way to have such great fun with us over at the Mommy Monday Blog Hop!