If you have kids, you probably have crayons.
At the start of every school year we start off with a new box of crayons. Then there are the crayons the kids get at restaurants and the crayons that come with art kits…
Pretty soon, if you’re like us, you have a ton of crayons taking up space.
Just what do you do with all those old crayons?
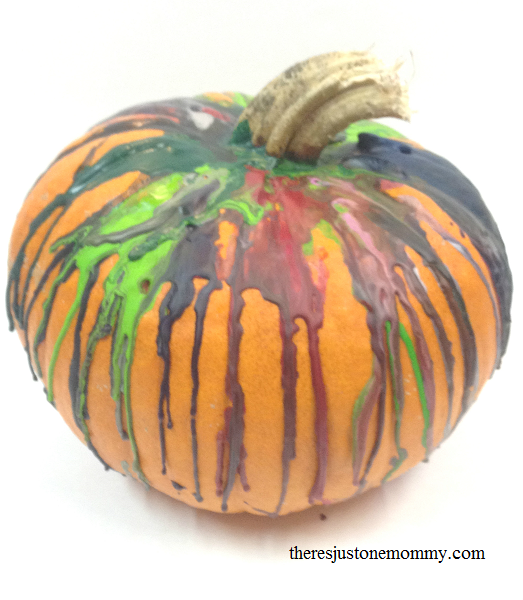
We had fun using our old crayons to make colorful Crayon Drip Pumpkins.
It’s one of our favorite no carve pumpkin decorating ideas. In fact, we do it every year.
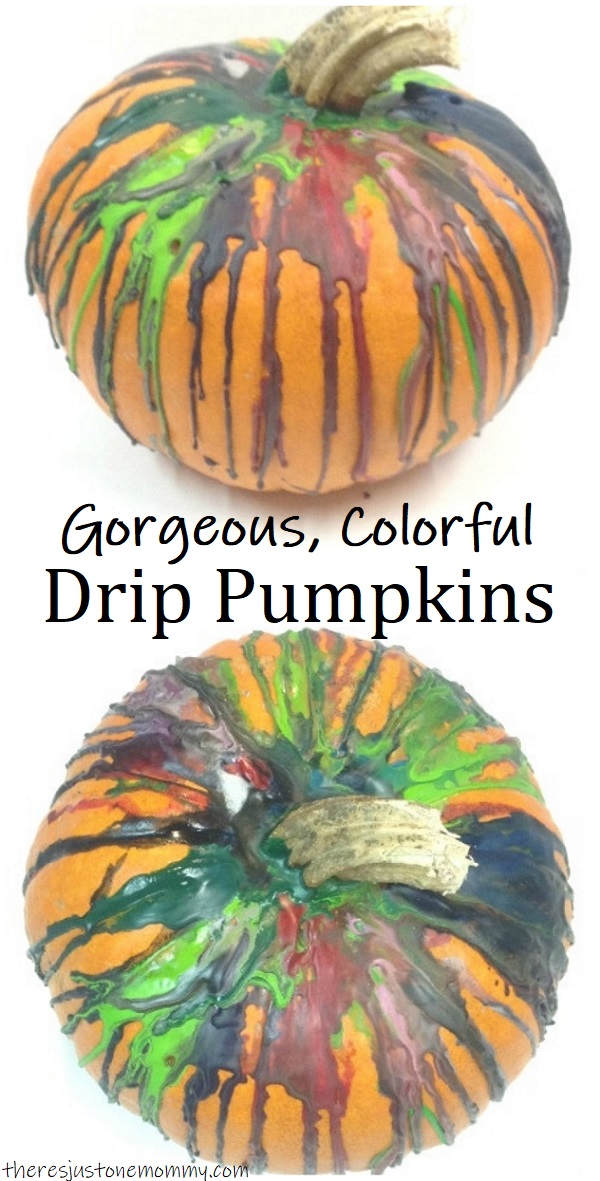
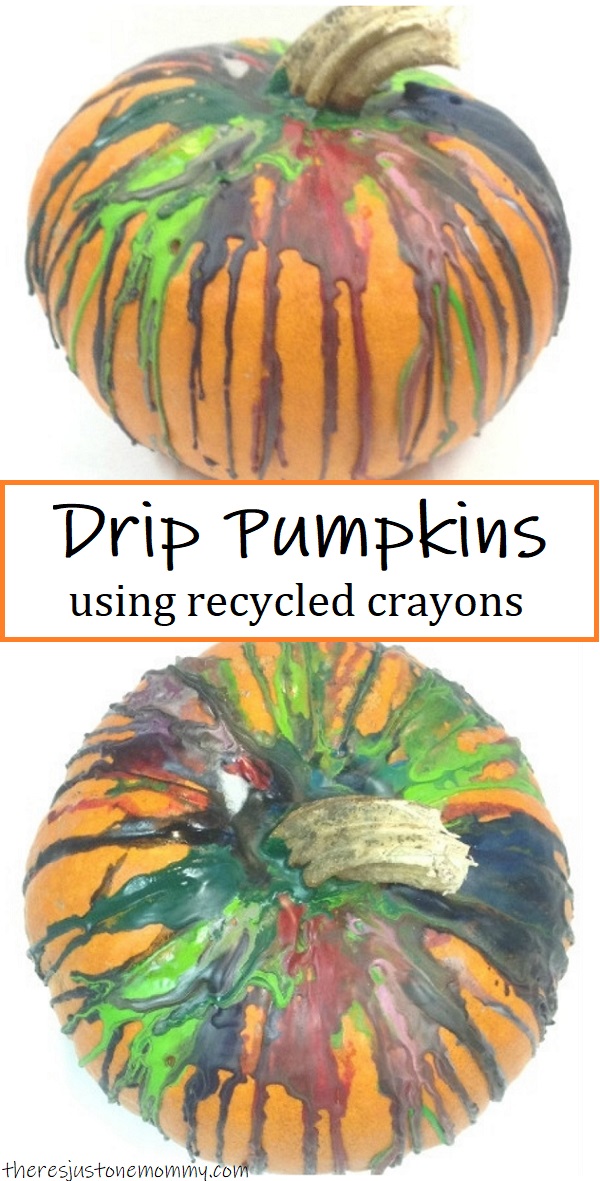
Crayon Drip Pumpkins
Materials Needed:
- Old crayons (I have found Crayola and Rose Art ones melt best.)
- Hair dryer or Heat Gun
- Pumpkins
Look through your old crayons and find the colors you want to use for decorating your pumpkin.
The paper will need to be peeled from each crayon before you can use them. This is a great way for kids to work on fine motor skills!
If you have a small pumpkin you may want to break crayons into smaller pieces, as you won’t need as much wax to drip down the pumpkin’s sides. For larger pumpkins keep the crayons whole.
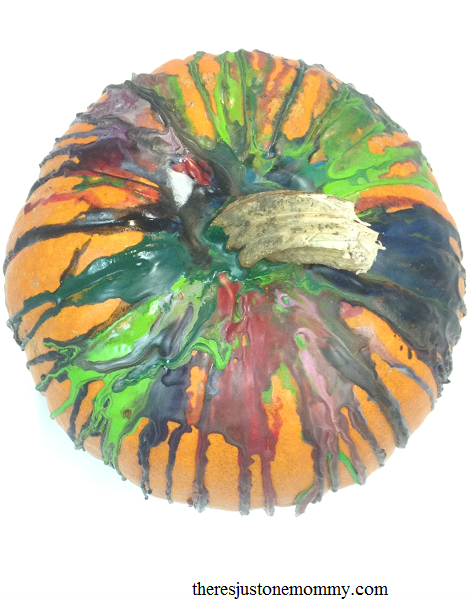
Then, arrange the crayons on top of the pumpkin, as shown below.
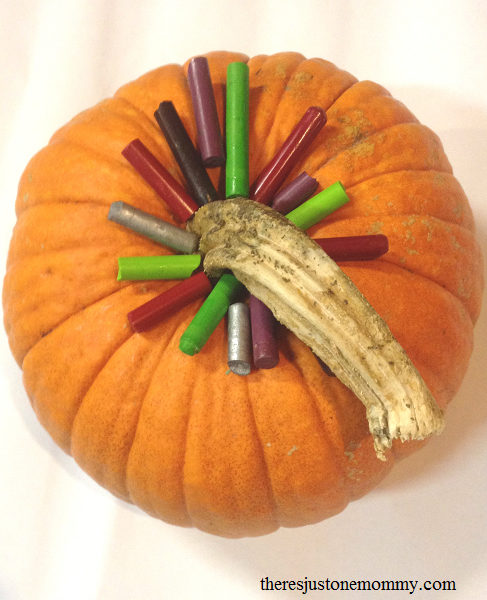
Our pumpkins all seemed to have a nice flat area on top where the crayons rested without rolling.
If you have a tall, narrow pumpkin, or your crayons don’t want to stay in place, you could use a bit of craft glue to glue them to the pumpkin. If you do this, you will need to wait for the glue to dry before you proceed to the next step.
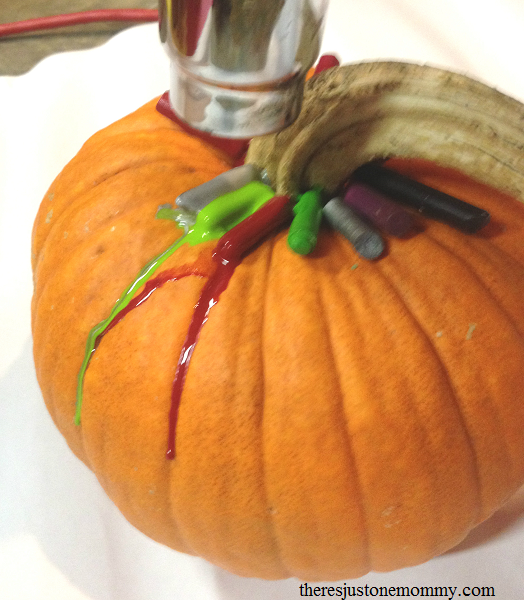
Next, you will use your hair dryer, or a heat gun, to melt the crayons. (Heat guns can get very hot, do not let a child handle one!)
We found that it worked best to do one section of the pumpkin at a time, concentrating the hot air on about 1/3 of the crayons, and then moving to the next group once those were melted. The kids loved watching as the colors melted and swirled together!
If your pumpkin has a deep indention where the stem is you will need to angle your hair dryer so it blows the melted wax down the pumpkin’s sides instead of letting all the wax pool around the stem.
Want your wax to stick to the pumpkin as it curves towards the bottom, instead of it hanging straight down?
Use the hair dryer and angle it at the bottom of the pumpkin’s sides while tilting the pumpkin a bit.
The results are colorful, unique pumpkins to display!
Not happy how it turned out? You can always add more crayons to the top of the pumpkin to add more color.
We did this pumpkin with two different sets of crayons, adding more greens the second time around.
Tips for this No-Carve Pumpkin Idea:
- Metallic crayons (like silver) give the pumpkin a really neat look.
- Using only red and black crayons gives the pumpkin a very Halloween feel, looking a lot like blood dripping down the sides.
- You will want more than one pumpkin to do this with, as it can become very addicting!
- Make sure you place your pumpkin on some old newspapers, drop cloth, or something else you don’t mind getting a bit of wax on because the wax will drip off the pumpkin a bit.
- If placing your pumpkin outside, try to put it in a spot that isn’t going to have sunlight the whole day. (We discovered the wax will melt a bit if you leave it too long in the sun!
Finally, there’s a fun and creative use for those old crayons this fall — crayon drip pumpkins!
I guarantee this no-carve pumpkin idea will be a hit.
***
Other pumpkin activities you might want to check out:
- Pumpkin Sink or Float Experiment — Do pumpkins float or sink? Find out with this simple experiment and then take a look inside the pumpkin to determine why.
- Make a Pumpkin Volcano — Give a classic science experiment a fun, fall twist.
- Hammering Nails in Pumpkins — This is always a huge hit. (Pun intended.) And it is perfect for getting that needed proprioceptive input, too.
- Pop-Up Pumpkin — Toddlers and preschoolers will love this cute craft.
Emma says
Ooh, so want to try this one! We have so many crayons but my daughter doesn’t even like to color so at least this way we can get some use out of them (and make something lovely in the process!)
OneMommy says
I bet she would love watching the colors swirl together!
Kim says
These crayon melted pumpkins are really fun! I was wondering how to melt the crayons. I pinned to try with the kids as soon as we get our pumpkins. I would love for you to come by Made for Kids link party and add this.
OneMommy says
I hope they have as much fun making them as we have!
Kim says
Thanks for linking them up! I’m sure they will have a blast!
the pARTy planning says
I HATE carving pumpkins – the smell, the mess – YUCK! This is such a great alternative! Especially for little ones who can’t be trusted with a knife!
OneMommy says
Oh, I hate the mess. My daughter loves to get really into the pumpkin and cleaning it out, and she isn’t always careful where she puts the goo. 😉
katy allred says
I have some already half-melted crayons that were left in a hot car that this activity would be perfect for 🙂
OneMommy says
Yes, those would be perfect! 🙂 Have fun decorating pumpkins.
Brenna says
Looks fun!
OneMommy says
They are fun — very addictive to make! 🙂
Melinda says
Bar none, this is the most creative pumpkin I’ve ever seen! And no one can ever copy it exactly! Woo hoo for unique!
Here from Inspire Me Monday.
Karen Patten says
What a great idea! (and no gooey pumpkin insides…). We have all these things at home and my younger son will absolutely love it! (The older one likes the gooey insides 🙂
OneMommy says
My son does not like touching the insides of the pumpkin either. 😉
Karen @ Raising Little Superheroes says
What a fun activity! I’m always looking for alternative way to decorate our pumpkins so we don’t have to carve them. Thank you for sharing at the #Made4Kids Link Up!
Chris Carter says
I’m TOTALLY doing this!! I just LOVE this idea! Thank you so much for sharing it, my friend!!!
OneMommy says
You totally should try it — it’s very addicting, though, so be sure to have a few pumpkins on hand! 🙂
Melissa Roy says
What a great idea and easy, fun craft for the kids. Will definitely be trying this out this fall! Thanks for linking up with #BeyondMommyingSiS
Jessica says
What a great idea!! Thanks for sharing!
Ducks 'n a Row says
Love decorative pumpkins. This is the coolest idea! Pinned, stumbled, tweeted AND selected your post as my Editor’s Pick for the next Wonderful WEdnesday Blog Hop on Ducks ‘n a Row! We start Tuesday evenings at 7pm ET. Hope to see you there.
OneMommy says
Thank you so much for sharing it!
Looking forward to hoping over your way again!
Helen @ Witty Hoots says
I love how colourful these are! Thank you for joining in with the Frugal Family Linky this week!
swanpna says
Sounds good! I’ve given up on melting crayons though. They just don’t!
Elaine Livingstone says
ooohhhh I like this