
I’m going to be honest. We didn’t get in as much science this school year as the kids would have liked.
So this summer we are focusing on having fun with science experiments and STEM activities for kids.
This week we had fun making this simple ball blower.
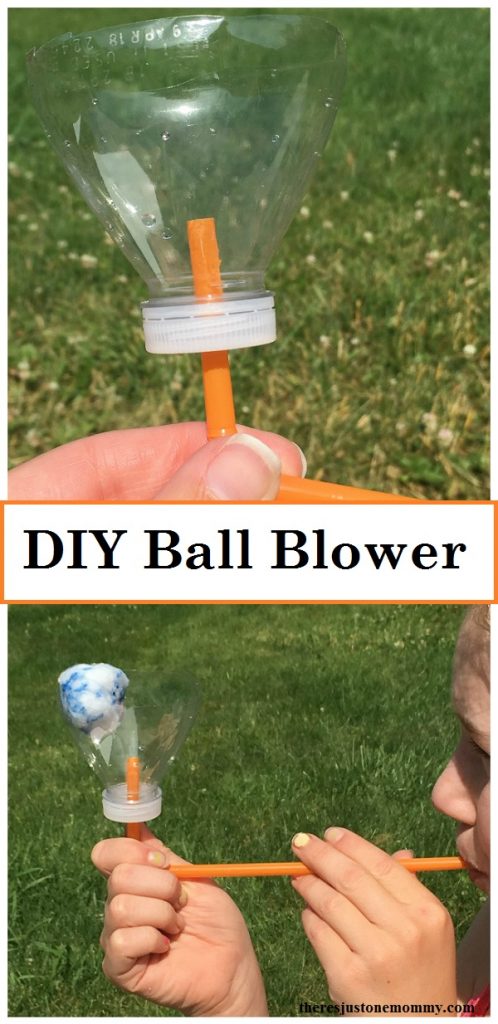
This simple ball blower craft is perfect for showing the power of air. You may also want to try making a homemade wind anemometer.
Plastic Bottle Ball Blower
Affiliate links have been provided at no extra cost to you.
Materials:
- Empty Plastic Water Bottle
- Bendable Drinking Straw
- Wide Nail (or sharp knife)
- Scissors
- Ping-Pong Ball
- Cotton Ball
- Permanent Markers (optional)
How to Make a Ping Pong Ball Blower
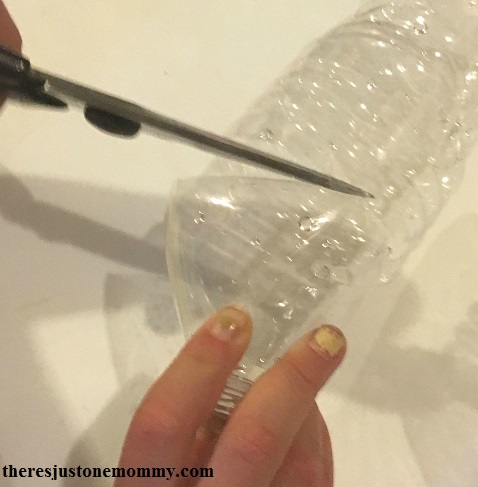
Start by unscrewing the lid from your bottle. Use your nail or a sharp knife to poke a hole in the center of the lid.
You want the hole to be big enough for the straw to fit through, but not so wide it slips around. If you are using a knife you will need to slowly twist the knife tip in circles to make a round hole. (This step is best for an adult to do.)
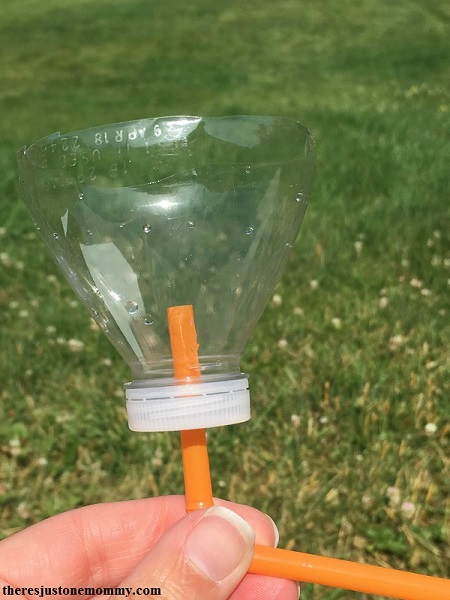
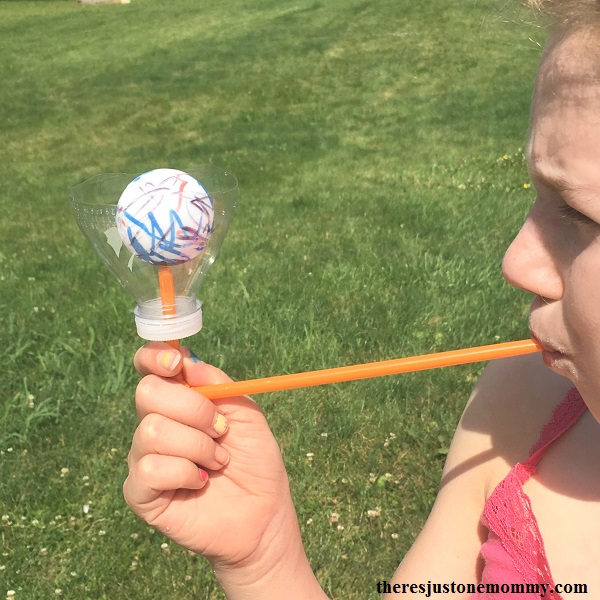
Next cut the top of your plastic bottle off, creating a cone for your blower.
Once your bottle is cut, screw the lid back into place.
Thread the short end of the bendy straw through the hole. We found it worked best when about 1/2 of the short end was threaded through.
If your child would like to decorate their ball blower, you can use permanent markers to color the plastic bottle. They can also use the markers to decorate the ping-pong ball and cotton ball.
Then it’s time to test out your ball blower.
The cotton ball is lots of fun for younger kids because it doesn’t take much blowing to see it move and even fly out of the blower.
Simply place it on top of the straw and blow.
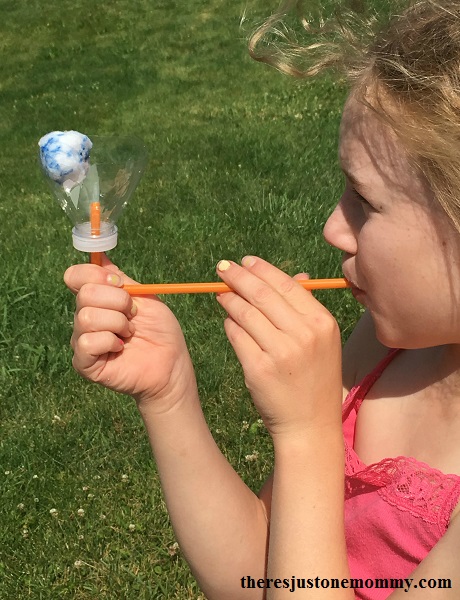
Now try the same thing with the ping-pong ball.
If you blow hard enough it will float above the straw. We got ours to spin in place above it.
If you want to sneak in a bit more science, you can use this activity to introduce Bernoulli’s Principle, which is the same principle that allows heavier than air objects like airplanes to fly.
The air you are blowing around the ball is moving faster and is at a lower pressure than the rest of the air. The ball attempts to leave that low area of pressure, but the higher air surrounding it keeps it in place.
Take it further:
- What other objects can you place in the ball blower?
- Try changing the length of the straw or the plastic bottle size. How does it affect what happens?
Making a ball blower is great for showing kids the power of wind. We also used it at VBS this summer to demonstrate that even though you can’t see something, it is still there — and powerful.
You might also enjoy:
- How to Make a Sundial
- Rising Water Candle Experiment
- Vanishing Ghosts (One of our most popular posts)
- Making Scrumptious S’mores with a DIY Solar Oven
- See the Sun’s Power with Sun Prints