This past week my youngest turned 5. And for his birthday he really wanted a pinata. Not just any pinata, but a dragon pinata.
I couldn’t find a dragon pinata anywhere, but honestly I try to keep to a fairly cheap birthday party budget anyway.
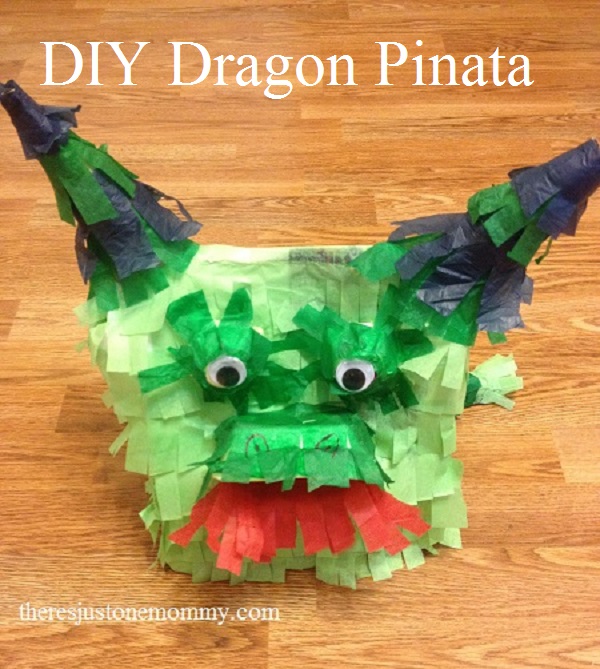
So I decided to make a homemade dragon pinata myself.
This simple pinata’ would be fun at a Godzilla birthday party, too.
I love coming up with thrifty kids party ideas.
For more ideas to help save you money, check out these DIY Star Wars Party Ideas.
How to Make a Homemade Dragon Pinata
Originally I planned to use a paper grocery bag as the base of the dragon pinata. But we had used up all the paper bags in an earlier craft, and I forgot to ask for more at my last grocery trip.
We did have a couple bags left from a variety of drive-thru trips this past week. (Don’t judge, it’s been a busy week here!)
So I decided to use a large take-out bag.
Once I had the base of the pinata, I cut several 1 1/2 inch wide strips of green tissue paper. Then I cut fringe along one side of the tissue paper strip and started gluing it into place.
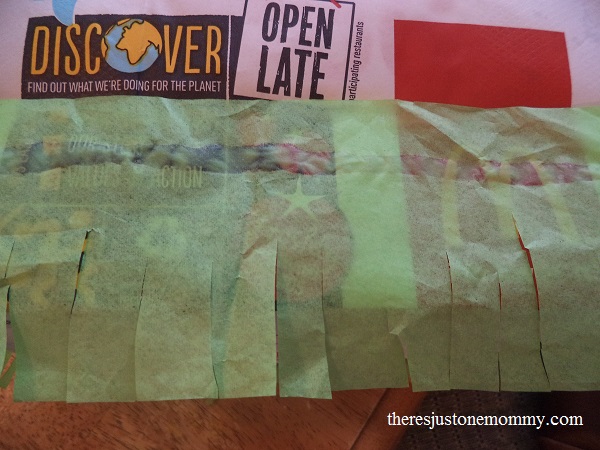
When adding the tissue paper, be sure to start at the bottom of the pinata. A small amount of white school glue will hold it firmly in place. Be careful not to use too much glue as tissue paper tears easily when it gets soggy!
I was originally just going to draw the face on with permanent markers and be done, but once I had the bag covered in green tissue paper fringe I spotted part of an egg carton left from doing some egg carton crafting earlier in the day.
A light bulb went off in my head and I started cutting pieces.
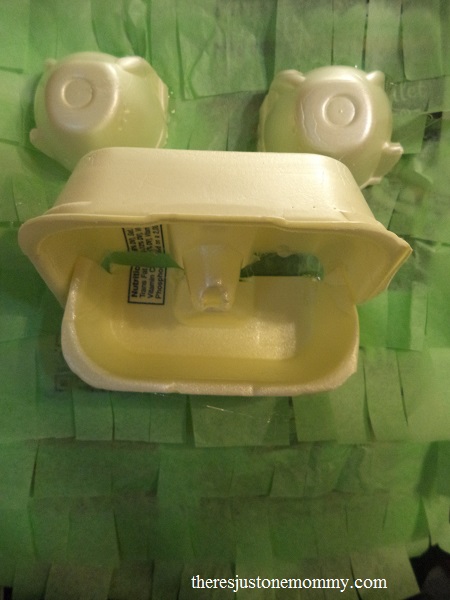
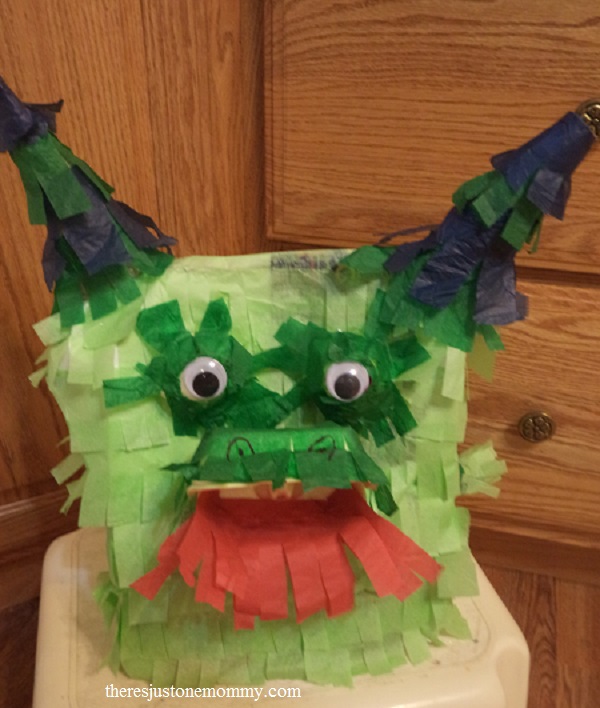
I cut off the ends from the top of the egg carton to form the dragon’s mouth. 2 “bumps” from the bottom of the carton formed its eyes.
After hot gluing these pieces into place I used more tissue paper fringe strips, this time in a darker green color, to cover them. A pair of large google eyes were also added.
I filled our pinata with a few handfuls of leftover Halloween candy. (Again, don’t judge! It was lollipops and Smarties…Things that last!) And then I folded the paper bag down at the top and secured it with clear packing tape. The tape would also make it stronger when I punched the hole at top to hang it.
I decided our dragon pinata was going to be a Chinese dragon, so it still needed some horns and a tail — no wings.
To form its horns I used a couple cardboard tubes, cutting slits along one side of each of them and using clear tape to turn them into cones. These were attached with clear packing tape and then covered with more tissue paper fringe.
His tail was formed with a smaller paper bag that I twisted up and then covered with green tissue paper. I used packing tape to hold it in place and then added yet more green tissue paper fringe to cover the entire tail.
Oh, and don’t forget the red “flames” for his mouth!
The homemade dragon pinata’ was a huge hit! (Pun intended!)
The kids used a plastic sword to whack at it (slaying the dragon) until it finally gave up all its candy treasures.
Thinking of doing your own dragon birthday party? Be sure to check out our dragon birthday cake!
You may also like:
Elizabeth says
I had to click here because my little one “must see” the dragon. It is darling and such a frugal way to make something fun for a party! Thank you for sharing. I am glad I stopped by!!
OneMommy says
🙂
I hope your little one liked looking at the dragon! Come back again sometime!
Erica Loop says
Great idea! So creative.
OneMommy says
Thank you!
Gude @HodgePodgeCraft says
This is great! So clever to use an egg box 🙂
Pam @ Everyday Snapshots says
Wow, you really did a fantastic job with this one. I know he absolutely loved it!
OneMommy says
He was thrilled to get to “slay the dragon” and be rewarded! 🙂
Ida says
You did a wonderful job. I love the theme of a dragon party. So fun! #sitssharefest
OneMommy says
Thanks! He likes to find ways to challenge Momma! 🙂