Math, spelling, plenty of reading… We do all of those on a daily basis. But when it comes to homeschooling, the kids absolutely love it when we try some new STEM activities for kids .
STEM challenges, which many now refer to as STEAM (science, technology, engineering, art, math), is so much fun they don’t even count it as schoolwork.
Recently we mixed my son’s love of vehicles of all kinds with their love of engineering activities for kids. This rubber band boat STEM activity was a huge hit and we couldn’t wait to share it with you.
The kids had so much fun when we did the build a boat that floats challenge with our homeschool group, that I knew they’d love engineering these plastic bottle paddle boats.
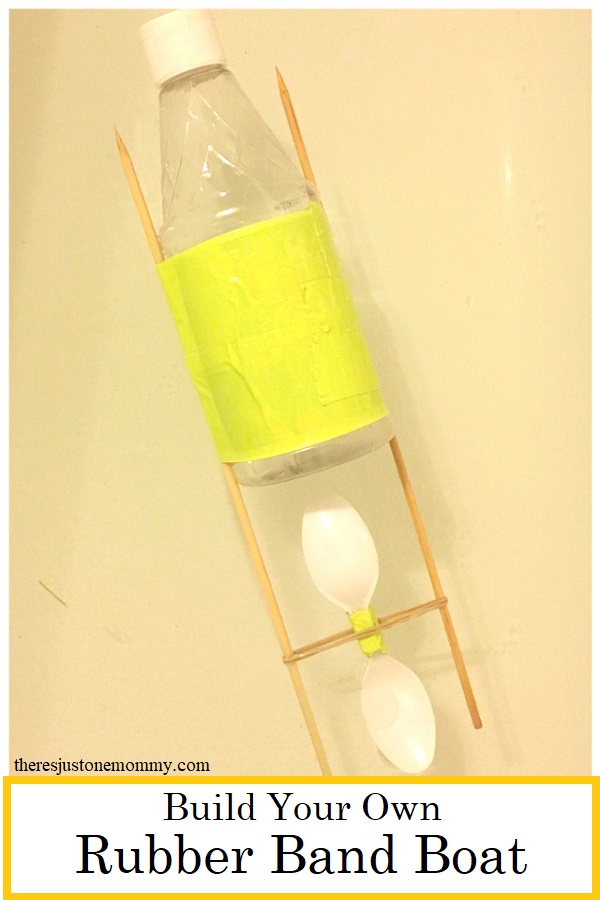
Rubber Band Boat STEM Activity
Materials Needed:
- Strong Plastic Bottle with Lid Attached
- 2 Wood Skewers or Chop Sticks
- Colorful Duct Tape
- 2 Plastic Spoons
- Rubber Band
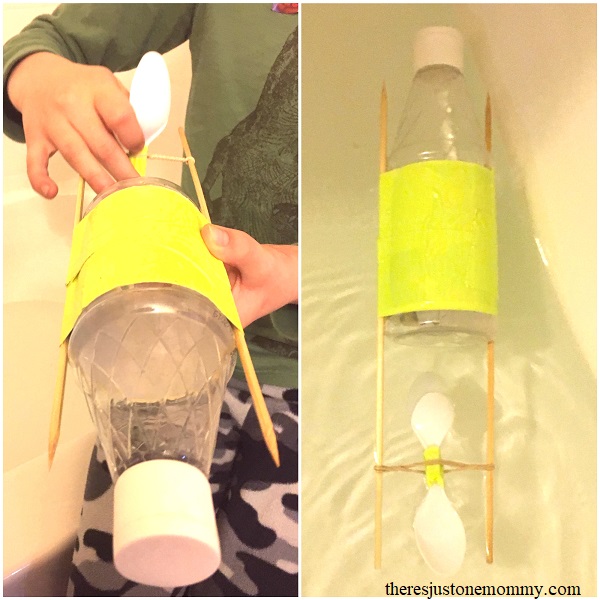
Start by helping your child tape the wood skewers to opposite sides of your plastic bottle. You want to have 6 inches of skewer left sticking off from the bottom of the bottle. Remember: the tips of the skewers are sharp. You may want to cut them off before doing this activity with the kids.
Now is the perfect time to let your child get creative with decorating their boat. Let them cover the rest of the bottle with colored duct tape if desired. They could also add details with permanent markers.
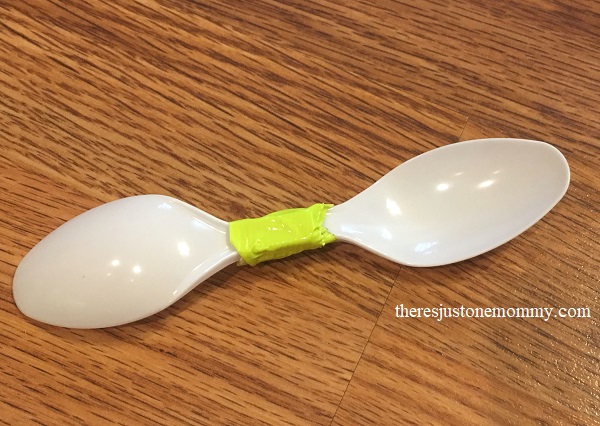
To make the boat’s paddle, break the bowls off your 2 plastic spoons, leaving 1/2 inch of the spoon handles attached. To make it easier to break off the bowl, you can use scissors to help score it. Or you can cut them with a knife.
Use a thin piece of duct tape to attach your spoon pieces together so that one bowl faces up and the other down.
To attach your paddle, stretch the rubber band over the skewer ends at the bottom of the boat. Then slide your spoon paddle into the rubber band.
Have your child test the paddle by twisting it backwards. The rubber band should wrap around the paddle. When they release it, the paddle should spin.
What will happen when the boat is put in water?
Fill your bathtub or a large plastic container with 4-5 inches of water.
Have your child twist up the paddle and set the boat in the water.
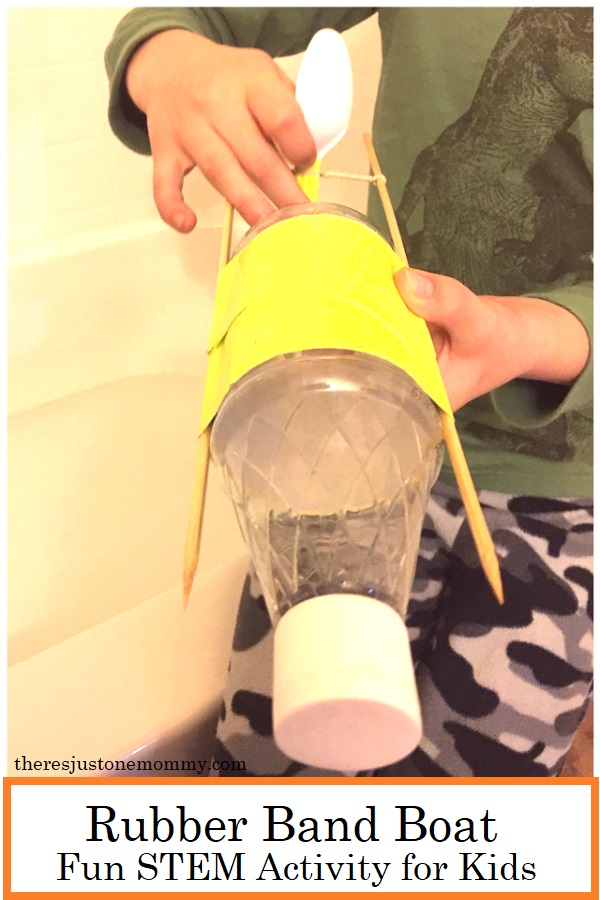
The boat should move forward.
If it goes backwards, twist the paddle the opposite direction of what they just did.
If your boat tips or flips over, you can put a little water in the bottle to help give it some weight.
Why does it work? When you twist the paddle in the rubber band, you are using your kinetic energy to give the rubber band potential energy. When you release the rubber band the potential energy changes to kinetic energy.
As the rubber band untwists, it turns the boat’s paddles. The Paddles push against the water and cause the boat to move forward. This is an example of Newton’s Third Law of Motion: every action has an equal and opposite reaction.
Extensions:
- Try twisting the rubber band as tight as you can. How does that affect the boat’s actions?
- Try moving the rubber band and paddle closer to the boat’s body. Does it affect how the boat works? What if you move it farther away?
We had lots of fun with this simple rubber band boat STEM activity. I hope your child loves it, too.
You’ll also like:
- How to Make a Balloon-Powered Boat
- Bottle Rocket Boat STEM
- Cardboard Tube Marble Run
- Craft Stick Catapult Peeps Game
- Make a Mechanical Hand with Straws
- How to Make Homemade Marbled Paper
Get more fun ideas like this delivered to your email by subscribing to our newsletter.
Mother of 3 says
What a fun STEAM project. My kids love this kind of thing too. I love that it gets them thinking creatively. Pinned.