Several years ago I bought a cheap bottle of blue hair gel so I could make squish bags for my then toddler. Afterwards we still had half a bottle of the gel, which got sat on a shelf and forgotten. This week we used the hair gel to create a new sensory bottle with stars that actually float towards the top of the bottle instead of sinking towards the bottom like our other calm down bottles.
Sensory bottles are great for kids of all ages. Babies and toddlers will enjoy holding the bottle and exploring its contents in a safe manner. Preschoolers have fun shaking them. And watching the contents swirl around the bottle can help kids of all ages calm down when upset and relax when stressed.
We keep a couple handy when working on school work. You can easily add a sensory bottle to the materials in your school or homework area as a simple way to help kids relieve stress and refocus on work.
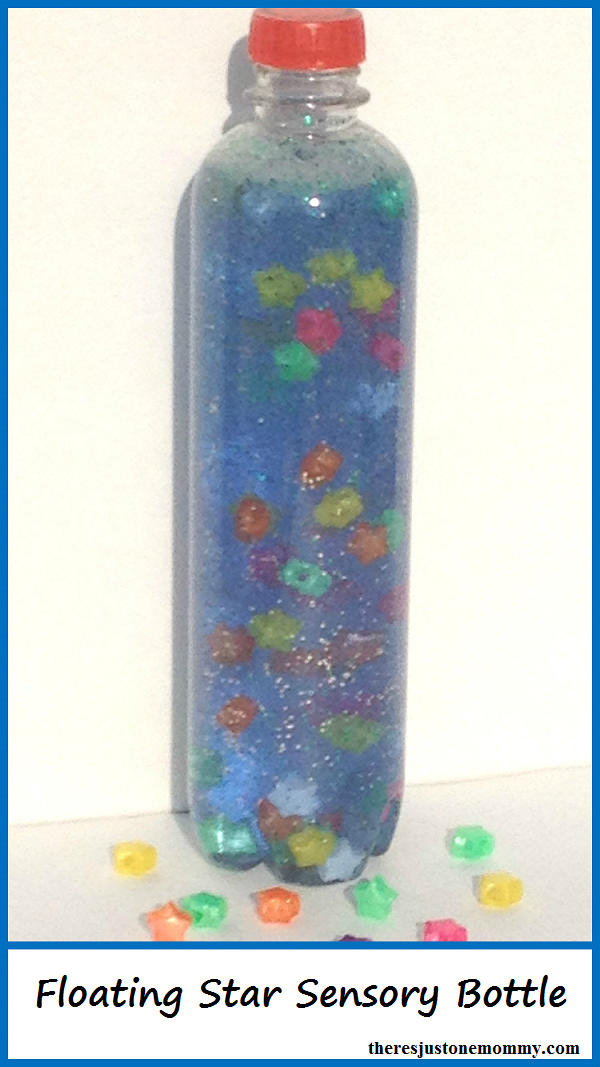
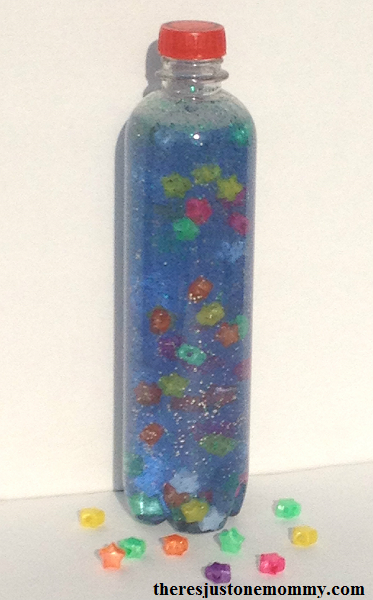
Floating Star Sensory Bottle
Materials:
- Clear Plastic Bottle with Smooth Sides (I used this one. But, these would be awesome.)
- Hair Gel
- Star-Shaped Beads
- Funnel
- Food Coloring (optional)
- Glitter (optional)
Use the funnel to put approximately 1/2 cup of hair gel into your bottle. Then add hot water until the bottle is 3/4 of the way full. Put on the lid and shake vigorously to mix the hair gel and water together. 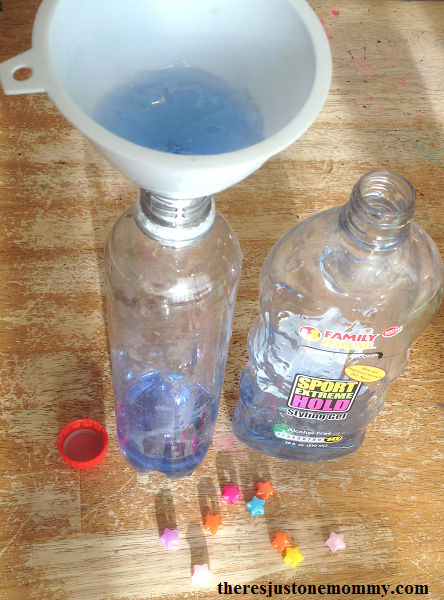
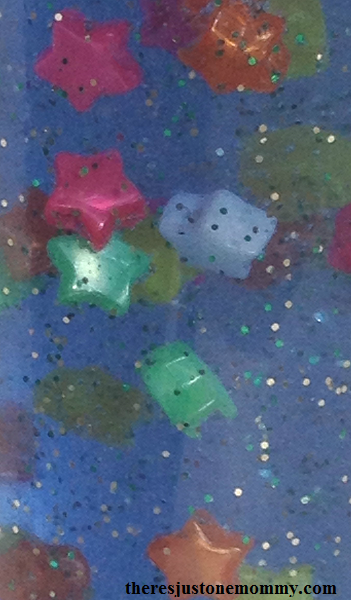
Add a few beads to the bottle and mix again. Watch what happens.
When we first did this we used a cup of hair gel and discovered the beads just kind of stuck in place. So we poured half the bottle of water and hair gel mixure out and added in more water. If mixed correctly, you will notice tiny air bubbles collecting on the beads and making them rise to the surface very slowly.
When you are satisfied with your mixture, add the remaining beads. (We used 40 in ours, but you can add more or less to your liking.) Add in a few drops of food coloring (or liquid watercolors) and a touch of glitter if desired. (Just add a few shakes of glitter. Adding more will cause it to clump.)
Put the lid back on and give it a good shaking.
You may want to leave the bottle sit over night before you glue the lid into place. That way you can make minor adjustments, adding water or hair gel to get the desired effect. We have found that after shaking our bottle the air bubbles cause half the stars to float to the top; the other half stick in place as the air bubbles pop or not enough collect on them to cause them to move. We could add a bit more water, allowing the beads to flow more freely, but my kids like it this way. (And since it’s for them, we’re leaving it.)
Once you are satisfied with your results, a bit of super glue will ensure little fingers don’t remove the lid and make a big mess.
The kids had fun helping make this sensory bottle. I used the opportunity to introduce the term “viscosity.” It was easy for them to see that the hair gel is much thicker, and therefore has more viscosity, than the water we used. They also had fun observing the beads as they moved through a glass of water and then later in our sensory bottle.
We are looking forward to creating a few more sensory bottles and experimenting with liquids of different viscosity in the future. For now our Floating Star Sensory Bottle has a place in our homeschool area, where they can shake it and use it to help them refocus before spelling quizzes or while working on math.
You may also like: