
If you are looking for fun new ways to keep kids busy and learning at home, then STEM activities are the perfect answer.
STEM projects challenge kids to get creative and to problem solve, all while having fun with science, technology, engineering and math.
And the best part is, you don’t have to have a lot of special materials when it comes to doing STEM at home.
Elementary aged kids will have fun exploring this mechanical hand STEM project, which uses items you probably already have at home.

This drinking straw STEM activity is a simple mechanical engineering project geared towards elementary kids.
Younger kids can get in on the fun, too, with these STEM activities for preschoolers.
Mechanical Hand STEM Activity
Materials Needed:
Affiliate links have been used below. See my full disclosure for more details.
- 4 Drinking Straws (Can be plastic or paper)
- Yarn or Heavy String
- Scissors
- Ruler
- Stapler
Interested in trying more of these projects at home?
Keeping a small collection of STEM supplies, on hand will eliminate the need to run to the store for items you need for future STEM ideas. Plus, having the materials together in one spot will encourage your child to experiment and explore on their own.
You may also want to check out the following ideas:
Marble Roller Coaster — Kids of all ages will have fun designing and engineering their very own mini roller coaster using pool noodles. Can they get their marble to go through a loop-de-loop? How many hills can the marble travel over?
Paper Plate STEM — Paper plates are an inexpensive material for kids to build and experiment with. Turn one into a sundial. Create a mini water wheel and explore hydro power.
Rubber Band Boat — Turn an empty bottle into a paddle boat, powered by a rubber band. Then see if you can get it to move across the bath tub or a swimming pool.
How to Make a Mechanical Hand with Straws
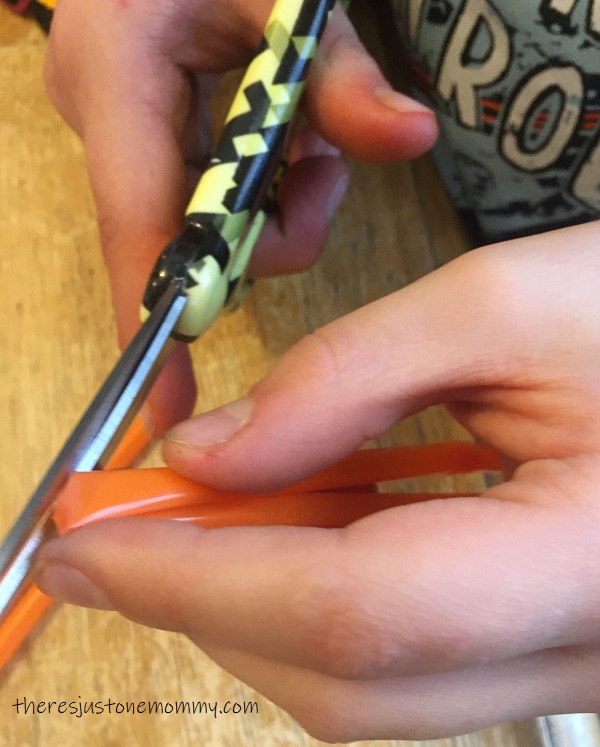
Start by measuring 1 inch (2.5 cm) from the end of your first straw. If you are using bendable straws, you will want to use the end opposite of where the straw bends.
At the one inch point, bend the straw in half, and use the scissors to snip off a corner of the bent area.
When you unfold the straw, there should be a small diamond-shaped hole.
Next, use your ruler to measure down 2 inches (5 cm) from the end.
Once again, bend the straw and snip off the corner. Make sure when you snip, it is on the same side of the straw as your first cut.
Make one more fold and snip at 3 inches from the end (7.5 cm).
Do this with each of your other 3 straws.

Now, cut 4 pieces of yarn, 12 inches (30.5 cm) long each.
Thread one piece of yarn through each of your straws.
We discovered a simple trick to getting the yarn through the straw. Push the yarn in as far as you can, and then suck on the straw on the opposite end. The suction will pull the yarn through.
You could also try using a wood skewer to push the yarn through the straw.
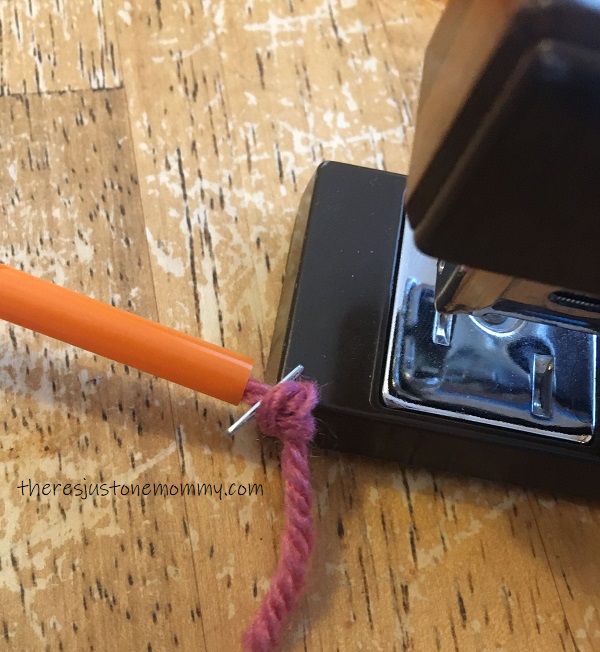
Once the yarn is through each straw, tie a double knot on the end closest to the diamond cuts.
Then place a staple over the knot and tie one more knot. This will keep the yarn from slipping through the straws.
As an alternative, if you have them available, you could tie a pony bead onto the end of the yarn instead of using the stapler to keep the knots from slipping through the straw.
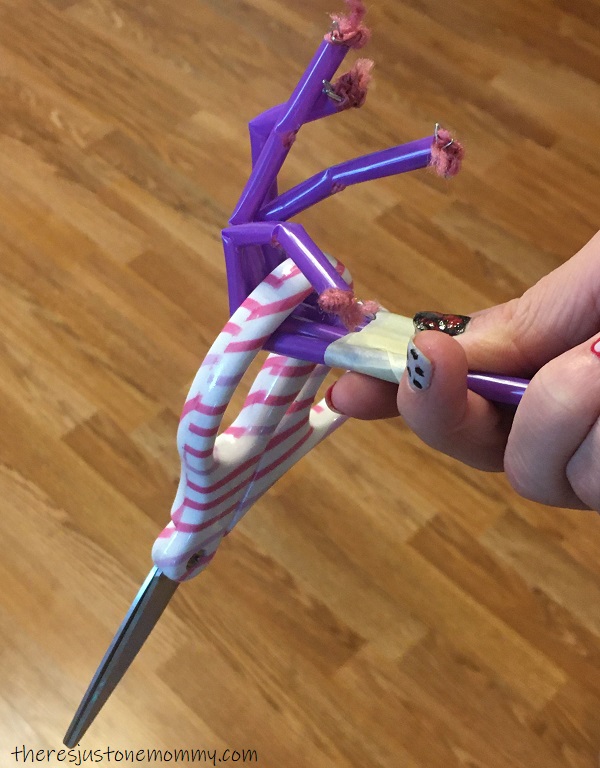
Once the yarn is secure, bend each straw at each of the three cut out diamond shapes, creasing the straw so the diamond cuts fold in on themselves.
Now your finger joints are ready to test out.

Use a piece of masking tape to secure the 4 straws together, making sure the cut out spots all face the same way.
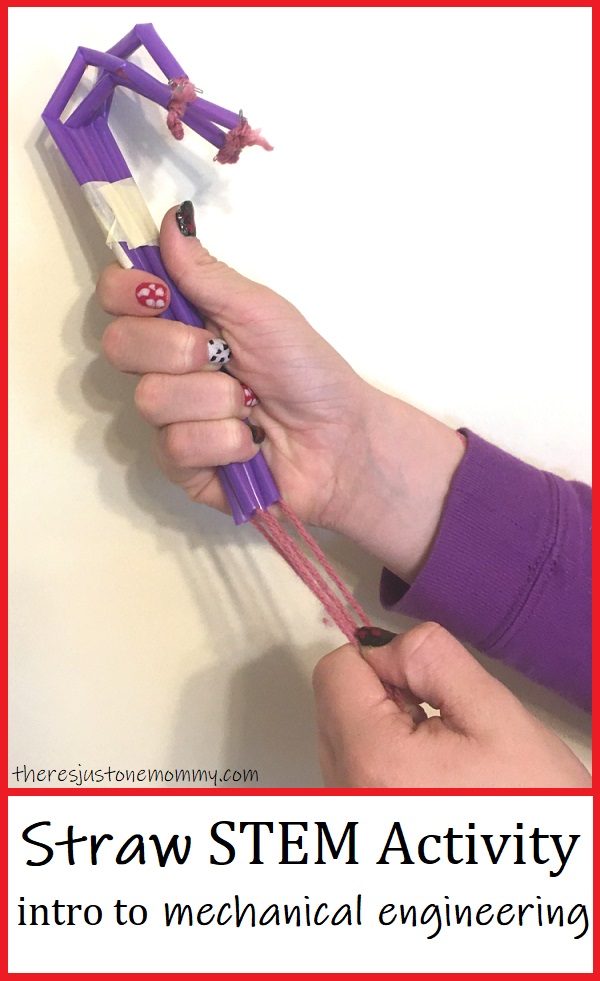
Hold your straw hand in one hand, and pull the 4 dangling pieces of yarn with the other hand.
Each of the straw fingers should curl up at their 3 joints.
If one of the joints doesn’t bend, try bending it again with your fingers to give it more of a crease.
Once you’ve made your straw fingers, try using them to pick up a few objects around your home.
How the Artificial Hand Works
There are 3 bones in each of your fingers. (There are 2 in your thumbs) These bones are called phalanges.
Just as the bones in your fingers meet at 3 separate joints, there are 3 joints in each of the straw fingers.
But the straws aren’t really acting as bones in this model.
Instead they represent tendon sheaths, and the yarn represents tendons.
Muscles and tendons are needed to move your bones. The muscles that help move your fingers are actually in your forearm.
There are long tendons that go from these muscles, all the way up to your fingers.
The tendons are inside what’s called a tendon sheath, which is a straw-like tunnel. This sheath is attached to each of the bones in your fingers and thumb. It helps to keep the tendons in place.
When you contract the muscles in your arm, the muscles pull on these tendons and move your finger bones.
You can easily turn this project into a fun anatomy lesson!
Challenge your child to create bones from cardboard to attach to their model. Or, try at this version of DIY robot hand.
Your child will have fun creating their own straw mechanical hand in this STEM activity.
You may also enjoy: