
We have been working on American history as we learn about the 50 states.
We spent several weeks talking about Jamestown and then we studied the Pilgrims and Plymouth Colony. Along the way we’ve had fun with several Native American crafts for kids.
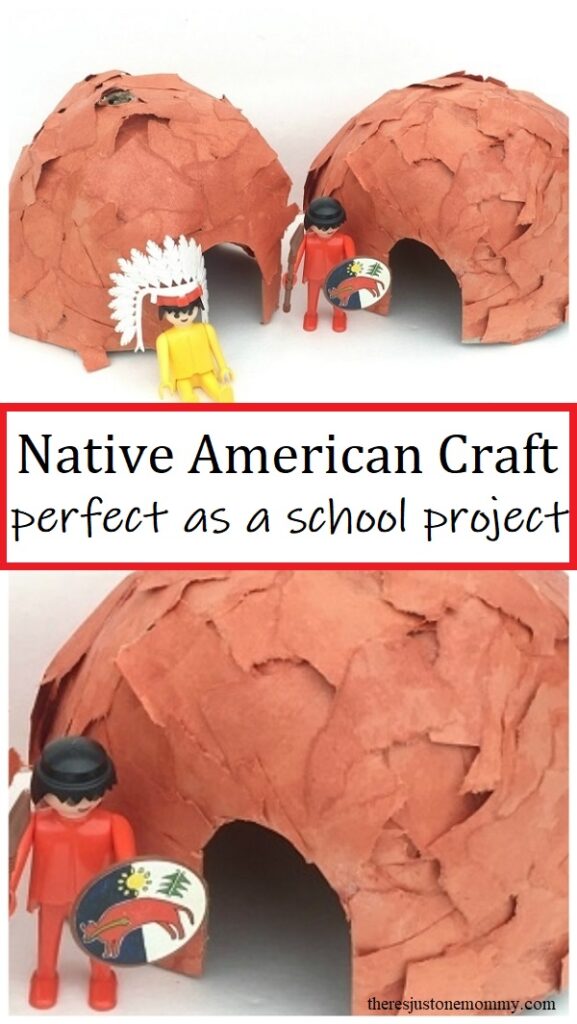
This simple wigwam craft is one that is perfect if you’re studying early American history.
Affiliate links have been used below. See my full disclosure policy here.
This wigwam model would be a fun addition to a Native American unit study. Research how to make a wigwam with your child or students, and then create your own mini version.
If you are studying Native Americans and early settlers, you may also want to try making your own corn husk dolls.
You could also use this wigwam project as a Thanksgiving craft for kids. Add a few figures and they’ll have hours of fun playing with their creation.
Wigwam Craft
Materials Needed:
- Thin Cardboard (We used cereal boxes.)
- Brown Construction Paper
- Liquid Craft Glue
- Paintbrush
- Stapler
- Shallow Dish
Start by getting your materials ready.
Instead of using a wooden frame, like a real wigwam, this miniature version uses thin cardboard.
Cut 3 cardboard strips that are 1 x 11 inches (2.5 cm x 28 cm). Cut another strip that is 1 x 16 inches (2.5 x 41 cm). (We actually stapled 2 smaller strips together to make ours because our box wasn’t big enough.)
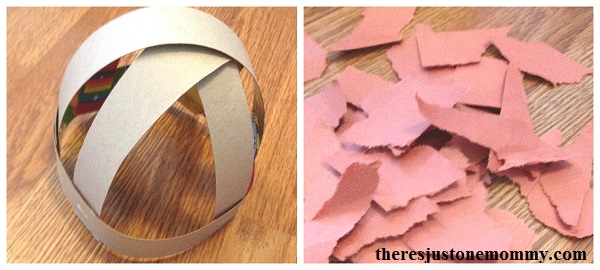
Form the longest cardboard strip into a circle and staple together. This will be the wigwam’s base.
Next, staple the 3 shorter strips to the cardboard circle to form a dome. (As shown in picture below.)
In place of the birchbark or woven mats that would be used you will be using brown construction paper.
Have your child rip the brown construction paper into 1 inch thick strips and then tear the strips to form 1 inch “squares.” They don’t have to be perfect, just approximately the same size.
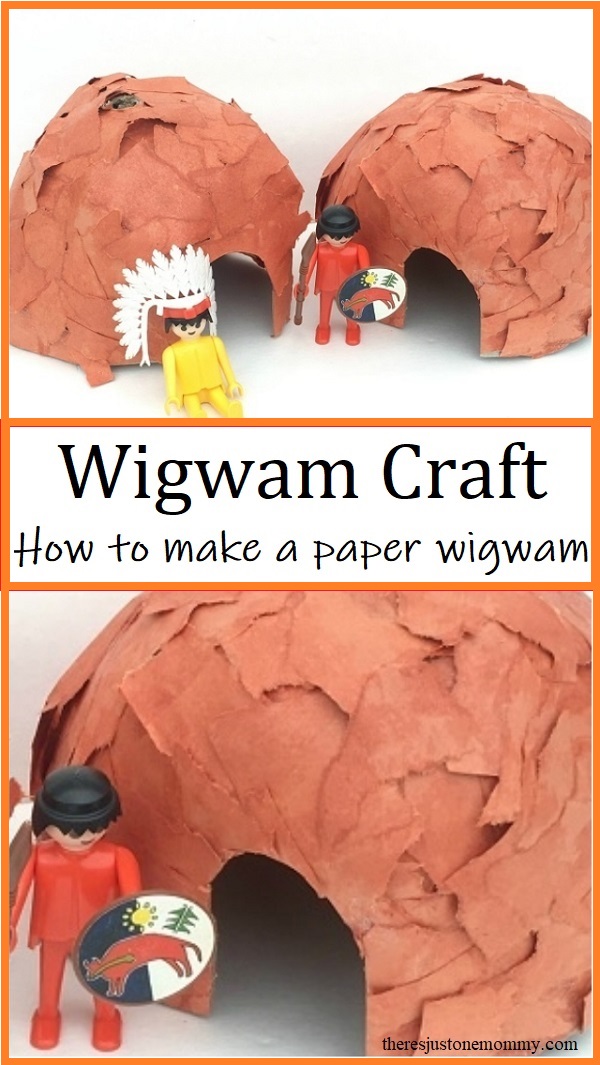
How to Make a Wigwam out of Paper
Pour glue into a shallow dish and use the paintbrush to glue the construction paper pieces to the cardboard strips.
Allow pieces of paper to overhang the cardboard strips. Once the cardboard pieces are covered, allow your project to dry some before continuing.
Once it has dried, it is time to fill in those spaces between the cardboard supports.
Glue the construction paper “bark” so it overlaps and begins to fill in those spaces. You may need to let it dry some as you work, depending on how much glue your child uses. Continue the process until the whole thing is covered in brown paper.
Allow it to dry.
To make the paper feel more like bark (and to make the structure stronger), use the paintbrush and cover the entire outside of the wigwam with one more layer of glue. This is the perfect time to patch any remaining holes with a few more squares of paper.
Then allow the whole thing to dry overnight.
Once it is dry, it is time to cut your door and a smoke hole at the top.
Use the tip of your scissors to slowly and carefully poke a hole at the top. You can wiggle them and turn your scissor blades to make the hole round. (This step is best done by a parent.)

We originally created our wigwams to go with our Jamestown unit. The kids discovered our Playmobil Native Americans were just the right size. They spent hours reenacting what we had learned about.
This wigwam craft would also be a great Thanksgiving craft. It pairs nicely with learning about the Mayflower and the Plymouth Colony. Young kids may also like these Mayflower crafts.
You may also like:
- Making a Wigwam for School from Sue at Home
- Make Your Own Tin Can Lantern — Colonial America Craft
- Turkey Craft to Increase Fine Motor Skills
- Go on a Candy Cane Hunt!
Originally published November 7, 2016.
Ginny Marie says
Your wigwams look great! We are studying the first Thanksgiving at our preschool and talking about wigwams. The kids love playing with the Playmobil sets we get out at Thanksgiving, too!
OneMommy says
My son has been having so much fun using these with our Playmobil. When we first started, I wasn’t thinking they’d actually have anything that would go with them….but right away he grabbed them out of our drawer and they fit perfectly. 🙂