
There is just something magical about flickering lights coming from a collection of lanterns.
Whether they’re hanging from the trees at an outdoor party, or they are displayed on tables at a wedding, lantern light brings a new dimension to the atmosphere.
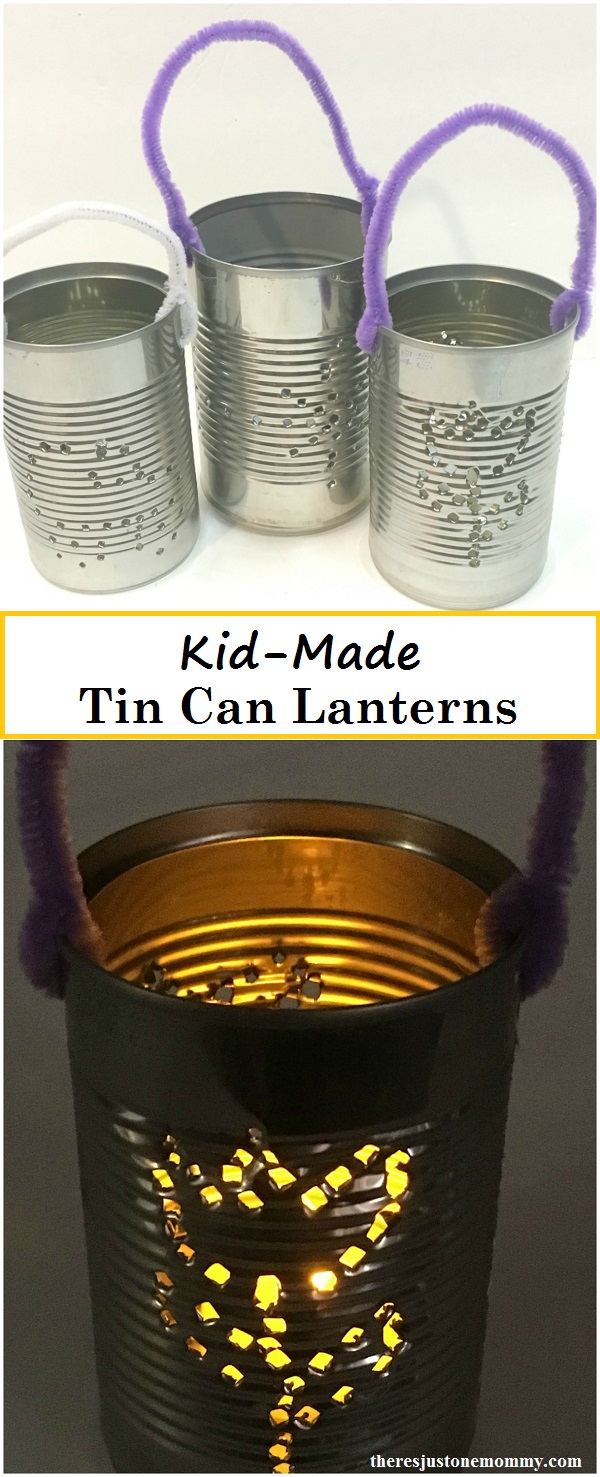
Kids can capture a bit of that magic with this simple recycled craft: Tin Can Lanterns.
This year we started learning about the 50 states while going through American history. We started with a brief look at early explorers and then had a lot of fun studying Jamestown, making this wigwam craft as part of the unit.
As we moved on to the Mayflower and Plymouth Colony, we talked about what kinds of skilled workers you would want in a new colony.
A community’s blacksmith would make a variety of tools as well as things needed for colonial homes, including lanterns. The kids were excited to make their own version with this tin can lantern craft for kids.
Affiliate links have been used in the post below; see my full disclosure here.
Kids Craft: Tin Can Lanterns
Materials Needed:
- Empty Cans (We used soup cans and one from canned vegetables.)
- Hammer
- Nail
- Pipe Cleaners (or piece of wire)
- Tea Light Candle
Start by removing the wrapper from your cans and thoroughly cleaning them.
Simple shapes and patterns work best on kid-made lanterns. Think flowers, stars, hearts, etc.
If you want, you can use a permanent marker to draw the shape on your tin can ahead of time. (Just use a bit of hand sanitizer to remove the marks later.) Or, you can freehand your pattern, which is what we did.
Fill your can with water, leaving about 1/2 inch of space at the top and place it in the freezer overnight. (The frozen water will help you make your pattern without denting the can.)
Once the water is frozen solid, use a nail and gently hammer it against the can to create your pattern.
Placing a kitchen towel under the can will help keep it from rolling. It’s also handy for warming up fingers that get cold from working with that cold metal!
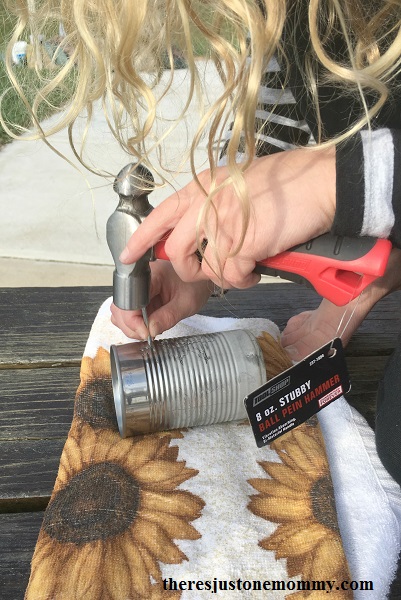
For projects with the kids, I love our new stubby ball pein hammer. It is perfect for little hands, and I like that it doesn’t have that claw end most hammers have. (Watching my son swing that by his face made me nervous.)
After you have finished your design, use the hammer and nail to make 2 holes at the top of the tin can lantern, one on each side, to thread your handle through.
I have seen lanterns that use pieces from wire hangers, and for older children you may choose to do this. Mine wanted to use colorful pipe cleaners, which were super easy for them to put on the lanterns by themselves.
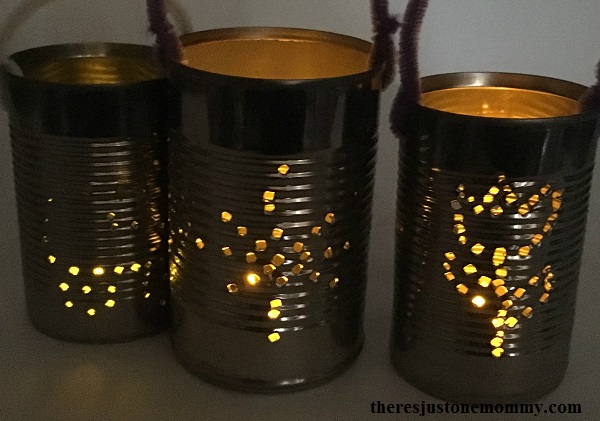
Once the ice has melted and been removed from the lantern, it is time to light it. Tea light candles work best for these small cans.
For real candles, drip a bit of wax at the bottom of the can, or use some clay, to help hold your candle in place. (And remember: never leave burning candles unattended.) We chose to use battery tea lights in ours.
Keep in mind, the inside of the can will have sharp spots now because of the holes you created with the nail and hammer. To avoid cuts, children should not reach into the can lanterns. Instead, you can tip the can sideways to remove battery lights.
We made our tin can lanterns as part of our colonial America unit.
They would also be lovely at Christmas time with snowflake designs or snowmen on them.
No matter what you make them for, I suggest a bit of snuggling under the blankets by the magical glow of the flickering light and just soaking in a few minutes with your kids once this kids craft is done.
You may also like:
- How to Make Tin Can Stilts
- DIY Tin Can Lanterns with a Valentine’s Day Twist on Red Ted Art
- Make Your Own Tin Can Stove
- Colonial America Craft — Make a Wigwam
Originally published November 19, 2016.
Ginny Marie says
Your kids did a nice job! I think my girls would love this project! We have a week off from school for Thanks giving, and this will be the perfect project!
Mother of 3 says
Isn’t this such a fun craft?! My boys and I did this one Christmas and we just loved it. Thanks for sharing with us at the Virtual Fridge; Pinned.